-
Custom Line Graph 그리기(Samsung Health Graph)Android 외 개발 2019. 4. 5. 19:43
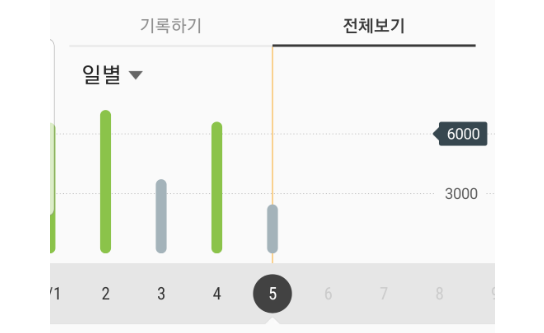
프로젝트 진행 중 위와 비슷한 요일 그래프를 만들어야 되었고, Google 검색을 통해 비슷한 라이브러리들을 찾았지만 실패하였습니다.
가장 유사한 오픈 라이브러리는 MPAndroidChart(https://github.com/PhilJay/MPAndroidChart) 였지만, 화면 Touch drag and drop 처리가 잘 되지 않아서 포기 하게 되었습니다.
그래서 결국 직접 만들어 보기로 했습니다.
먼저 그래프는 RecyclerView 를 생성해서 그리도록 layout 을 구성하였습니다.
    <FrameLayout
        android:layout_width="match_parent"
        android:layout_height="200dp"
        android:orientation="vertical">

        <android.support.v7.widget.RecyclerView
            android:id="@+id/rvGraph"
            android:layout_width="match_parent"
            android:layout_height="match_parent"
            android:background="@color/bg_main_gray"
            android:scrollbars="horizontal"/>

        <View
            android:layout_width="2dp"
            android:layout_height="match_parent"
            android:layout_gravity="center"
            android:background="@color/red"/>

    </FrameLayout>
Line 을 그릴 수 있도록 UI 를 만들었습니다.
Line 의 넓이와 길이는 코드로 조절할 예정입니다. UI 부분을 코드로 만들어도 상관없을 것 같습니다.
<?xml version="1.0" encoding="utf-8"?>
<FrameLayout xmlns:android="http://schemas.android.com/apk/res/android"
             android:layout_width="wrap_content"
             android:layout_height="match_parent"
             android:background="@color/bg_graph_orange"
             android:layout_gravity="center_horizontal|bottom">

    <View
        android:id="@+id/graphLine"
        android:layout_width="5dp"
        android:layout_height="0dp"
        android:background="@drawable/bg_green_line"
        android:layout_gravity="bottom"/>

</FrameLayout>
그리고 Graph Line 색상의 bg_green_line.xml 로 만들었습니다.
<?xml version="1.0" encoding="UTF-8"?>
<shape xmlns:android="http://schemas.android.com/apk/res/android">
    <solid android:color="@color/green"/>
    <corners android:radius="5dp"/>
    <padding android:left="0dp" android:top="0dp" android:right="0dp" android:bottom="0dp" />
</shape>
이제 그래프 UI 부분이 끝났습니다.
이제 RecyclerView를 그릴 수 있는 Adapter 를 생성해야 합니다.
data 를 필수 파라메타를 받고 있으며, 가로의 항목 설정은 setWidthCount 함수로 설정하게 하였습니다.
세로 항목의 길이 설정은 setHeightCount를 통해서 할 수 있습니다.
public class GraphAdapter extends RecyclerView.Adapter<GraphAdapter.ViewHolder> {
    private List<WorkingHour> data;
    private int width = 0;
    private int height = 0;
    private int widthCount = 7;
    private int heightCount = 24;
    private int graphLineWidth = 15;

    public GraphAdapter(List<WorkingHour> data) {
        Trace.d("GraphAdapter");
        this.data = data;
    }

    public void setData(List<WorkingHour> data) {
        this.data = data;
    }

    public void setWidthCount(int widthCount) {
        this.widthCount = widthCount;
    }
    public void setHeightCount(int heightCount) {
        this.heightCount = heightCount;
    }

    public void setGraphLineWidth(int graphLineWidth) {
        this.graphLineWidth = graphLineWidth;
    }

    @NonNull
    @Override
    public ViewHolder onCreateViewHolder(@NonNull ViewGroup viewGroup, int i) {
        LayoutInflater inflater = LayoutInflater.from(viewGroup.getContext());
        View v = inflater.inflate(R.layout.item_graph_line, viewGroup, false);
        width = viewGroup.getWidth();
        height = viewGroup.getHeight();

        if(width <= 0) {
            DisplayMetrics dm = viewGroup.getContext().getResources().getDisplayMetrics();
            width = dm.widthPixels;
        }
        ViewGroup.LayoutParams params = v.getLayoutParams();
        params.width = width / widthCount;
        params.height = ViewGroup.LayoutParams.MATCH_PARENT;

        v.setLayoutParams(params);
        return new GraphAdapter.ViewHolder(v);
    }

    @Override
    public void onBindViewHolder(@NonNull ViewHolder holder, int i) {
        int workHour = data.get(i).getWorkHour();
        int currentHeight;
        if(workHour > 0) {
            currentHeight = (height * workHour) / heightCount;
        } else {
            currentHeight = 0;
        }
        ViewGroup.LayoutParams line1_param = holder.graphLine.getLayoutParams();
        line1_param.width = graphLineWidth;
        line1_param.height = currentHeight;
        holder.graphLine.setLayoutParams(line1_param);
    }

    @Override
    public int getItemCount() {
        return data!=null?data.size():0;
    }

    class ViewHolder extends RecyclerView.ViewHolder {

        private View graphLine;

        public ViewHolder(View itemView) {
            super(itemView);
            graphLine = itemView.findViewById(R.id.graphLine);
        }
    }
}
이제 Adater 를 사용할 Activity 의 구현 하도록 하겠습니다.
현재 구현 예정인 부분은 일주일 단위의 근무시간이라 예제로 표현하였습니다.
public class TAActivity extends BaseActivity<TAViewModel, ActivityTaBinding> {

    @BindView(R.id.rvGraph)
    RecyclerView rvGraph;
    GraphAdapter graphAdapter;

    private ArrayList<WorkingHour> workingHours = new ArrayList<>();
    private int week = 7;
    private int hour = 24;
    private int lineWidth = 30;

        @Override
    protected int getLayoutRes() {
        return R.layout.activity_ta;
    }
가로 갯수는 7일 , 세로는 24시간 기준으로 잡았으며, line 크기는 30px 로 설정을 하기 위한 변수입니다.
    @Override
    protected void onCreate(@Nullable Bundle savedInstanceState) {
        super.onCreate(savedInstanceState);

        setRamdomData();

        LinearLayoutManager linearLayoutManager = new LinearLayoutManager(this);
        linearLayoutManager.setOrientation(LinearLayoutManager.HORIZONTAL);
        linearLayoutManager.setStackFromEnd(true);

        graphAdapter = new GraphAdapter(workingHours);
        graphAdapter.setWidthCount(week);
        graphAdapter.setHeightCount(hour);
        graphAdapter.setGraphLineWidth(lineWidth);
        rvGraph.setLayoutManager(linearLayoutManager);
        rvGraph.setAdapter(graphAdapter);
    }
LinearLayoutManager 의 설정값을 Horizontal 모드로 설정, 마지막에서 시작할 수 있도록 setStackFromEnd(true) 로 설정하였습니다.
그리고 구현된 Adapter 에 변수들을 설정하였습니다.
테스트로 workingHours 변수들은 Random 함수로 100개 생성하였습니다.
이제 마지막으로 Scroll 시 중앙으로 올 수 있도록 만드는 부분을 구현하겠습니다.
   private void autoScroll() {
        FrameLayout graph = null;

        if(workingHours.size() > 0) {
            int[] xy = new int[2];
            int gap = 0;
            int position = 0;
            int minimumGap = -1;

            for (int i = 0; i < rvGraph.getChildCount(); i++) {
                graph = (FrameLayout) rvGraph.getChildAt(i);

                if(graph != null) {
                    graph.getLocationInWindow(xy);
                    position = xy[0] + (graph.getWidth() + lineWidth)/2;
                    gap = position - rvGraph.getWidth();

                    if(minimumGap == -1 || Math.abs(gap) < Math.abs(minimumGap)) {
                        minimumGap = gap;
                    }
                }
            }
            rvGraph.smoothScrollBy(minimumGap, 0);
        }
    }
위의 autoScroll 를 실행하는 부분으로 listener 를 추가하였습니다.
        rvGraph.addOnScrollListener(new RecyclerView.OnScrollListener() {
            @Override
            public void onScrollStateChanged(@NonNull RecyclerView recyclerView, int scrollState) {
                super.onScrollStateChanged(recyclerView, scrollState);
                if(scrollState == RecyclerView.SCROLL_STATE_IDLE) {
                    rvGraph.post(() ->  autoScroll());
                }
            }
            @Override
            public void onScrolled(@NonNull RecyclerView recyclerView, int dx, int dy) {
                super.onScrolled(recyclerView, dx, dy);
            }
        });
이제 간단하게 구현이 끝났습니다.
실행한 화면은 아래와 같습니다.
결과 디자인 적인 요소가 없어서 Samsung Health 와의 차이가 있지만, 동작상으로 유사하게 보이는 것을 확인 할 수 있습니다.
'Android 외 개발' 카테고리의 다른 글